
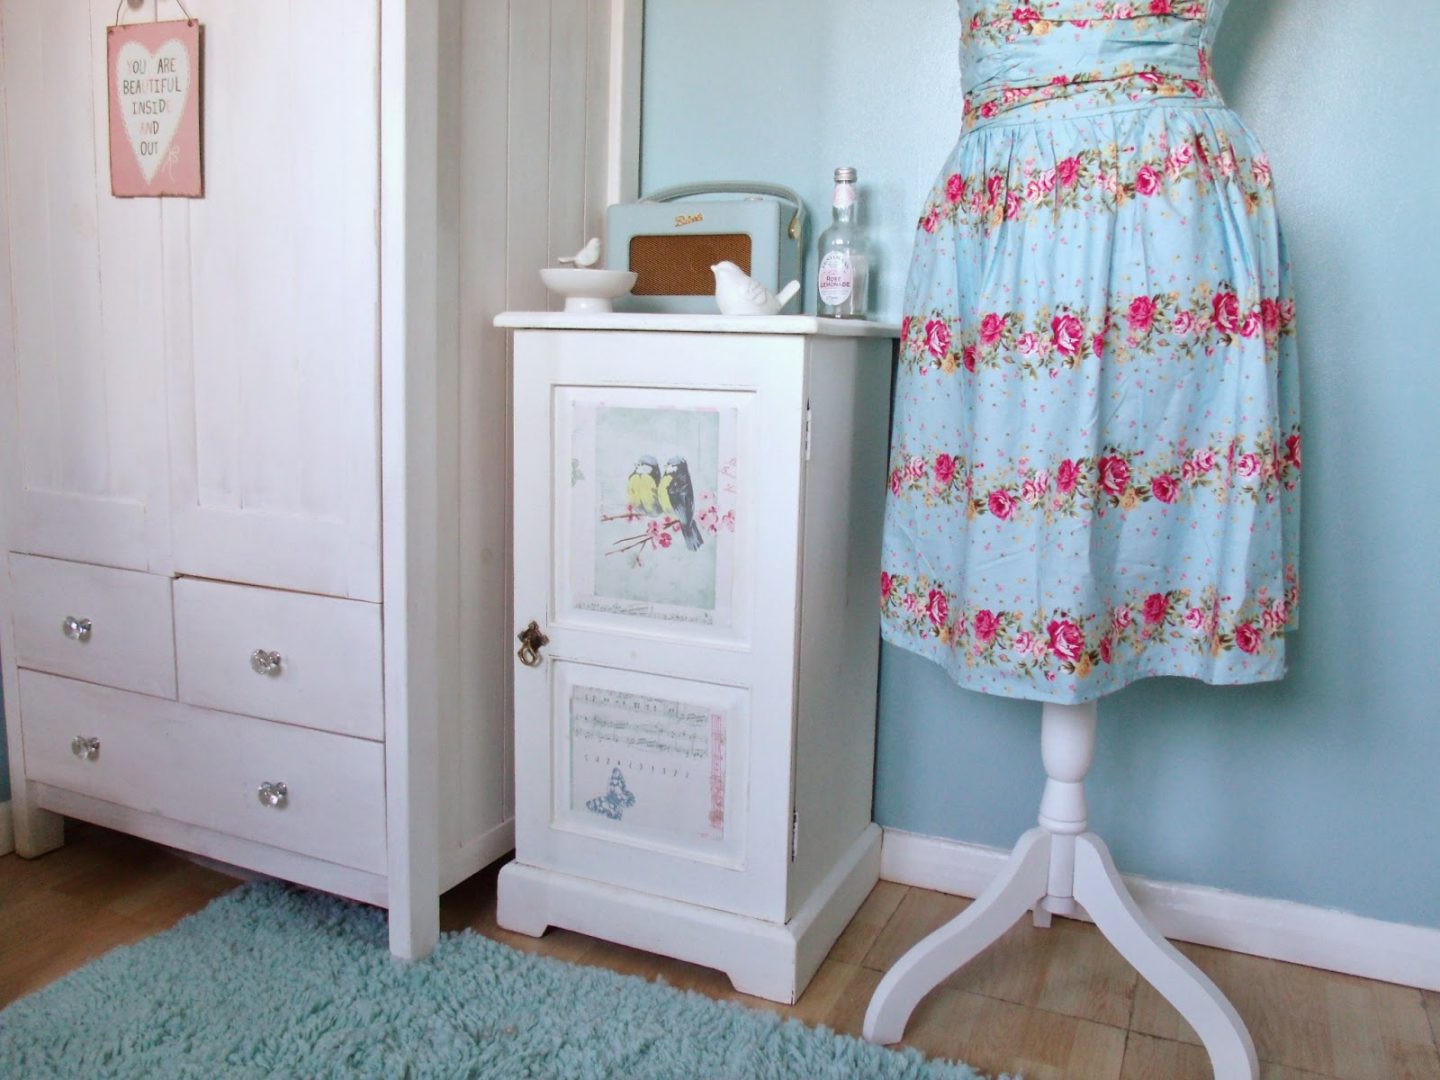
I was recently invited to take part in a creative blogger challenge with housing and regeneration specialists Keepmoat to create an affordable DIY home project. With a budget of £50 to come up with something inspiring and imaginative, I started thinking about what I could create right away. I began thinking of making a kitty cabin for Merlin to hide in, as he loves sleeping in boxes, but then I stumbled across a wooden cabinet in a charity shop.
 |
| The finished look |
I was having a little rummage in the store, and I fell in love with this little side cabinet as soon as I saw it. I instantly started imagining what I could do with it and where it could live, and as it was only £20 I thought I would give it a new home. The wood was stained quite a dark mahogany colour, so I also needed to buy lots of sandpaper (£1), a tin of white paint (£5), and some brushes (£1.50).
I bought it on Sunday morning and it was completed by Monday evening, so it was a very quick and easy project. On Sunday I spent the afternoon sanding it down to remove all of the dark varnish, which took quite a while (and made my arms ache!).
I then gave it a couple of thin coats of white paint and left it to dry overnight. The handle needed a bit of mending too, but I managed to fix it so that it opens and closes securely now. Then on Monday after work, I gave it a final coat of paint and was pleased with the final look.


However, I did think that it was maybe looking a little bit plain, and I thought I could give it a bit more imagination by adding something I had tried previously with another vintage project. You can get some gorgeous free wallpaper samples from home DIY stores, and I picked up this pretty shabby chic bird wallpaper from Wilko.
I measured the front and top of the cabinet and then cut some of the paper to size. I then simply used some PVA glue to attach the wallpaper to the wood. I love the colours in the paper and how it gives the cabinet a whole new look.


Overall it cost me a grand total of £27.50 to create this DIY project, which I think just goes to show that you can create something pretty and stylish from old furniture, and it can be done quickly, easily, and on a tight budget. You can often find good quality vintage wooden furniture for sale in antique and thrift shops, and it’s always simple to give it a new lease of life with a quick paint make over.
The cabinet fits in beautifully in my dressing room, and it matches the wooden table I did up over summer. I plan on using it to store my towels and bedding in, as it’s got a shelf on the inside. I love the final look, and I think the wallpaper was the perfect finishing touch to add something special to it!
What do you think of my latest DIY project?



Wow Victoria, that looks absolutely gorgeous!! It's amazing how cheaply you can have a whole new beautiful piece of furniture for, if you're not afraid to shop in charity shops and get creative. Love it!!
Hunter // paisley-stripes.blogspot.co.uk
XO
You're great at your home DIYs Victoria! This piece fits in effortlessly with your style and I really like how you decided to give it a twist with the vintage inspired wallpaper! x
Miss Imogen Smith
Hi!
I absolutely love your blog! Do you have a button i could add to my blog? 🙂 xxx
Amazing! Great post! Your blog is so beautiful! I do really like it! You did a great job! I’ll be happy to hear you opinion about my blog!)
Diana Cloudlet
http://www.dianacloudlet.com/
Wow! This is such a lovely transformation! I would love to try something like this!
Great blog! x
http://blessedbymeow.blogspot.co.uk
The tiny cabinet is looking pretty you have modified it beautifully.